Forgive us if this post comes across as a sermon. This is Sunday after all, and it is also our way of venting on a particular issue. So, here goes with one of our first commandments of historic property restoration…
When one restores a historical piece of property, one adopts the role of “keeper of culture”. Wittingly or not, this role automatically implants itself in those who step up and subsequently, INTEGRITY becomes the moral dilemma that confronts each task and each phase of a restoration project.
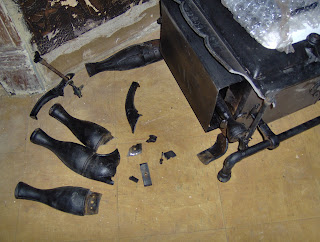
Integrity - NOT! This was an unfortunate eBay purchase.
Bad packing aside, the method of casting iron did not preserve
the build integrity of this stove.
Merriam-Webster defines integrity as the “firm adherence to a code of especially moral or artistic values”; Wikipedia expands on this definition as “a consistency of actions, values, methods, measures, principles, expectations and outcome.
Throughout our work on the Laura Hawkins house, we’ve weeded through much misguided advice and agendas and have become sufficiently schooled on the value of integrity. At the very least, we’ve learned some of what it constitutes and what it does not...
| THIS IS INTEGRITY | THIS IS NOT INTEGRITY |
| Putting the construction of the property back to its initial and intended state. This means the Laura Hawkins house should be removed of later addition asbestos-cement shingles, casted slurry, or aluminum siding. It also should have its dentils or other original features replaced if they were removed to accommodate the above added facades. | Masking or destroying parts of the property to make it something it is not.
|
| Taking the time to understand the methods used in constructing the property and then, empathizing with this during restoration. | Ignoring the time-honored methods used in constructing the property. This means removing an original porch and replacing it with a flimsier, newer one. [There’s a reason why many older homes have lasted as long as they have.] |
| Reveering interior features and doing everything in your power to retain them. | Converting interior features to accommodate certain lifestyles and in the process obliterate or destroy those things that make the house what it is. This means sawing into door jamb moldings to accommodate glass shelves. This also means tearing out fireplace mantels to sell them to the local second-hand store down the road - Yes, these things actually happened and we will discuss them in a later post. Meanwhile, here are photos of the dastardly fireplace mantel thefts...
|
Parlor Fireplace.
Fireplace in the adjacent "Green Room".
With that out of the way, we will now proceed to our next adventure in the Laura Hawkins project – the daunting task of restoring the original shingles on the front of the house. First, here is some bad advice we decided to ignore:
| -Cover the exterior with aluminum siding. This is not worth commenting on except to advise you to run, not walk, from a contractor who would advise this for a historic home.
|
| -Pressure wash the exterior and then paint it. Bad, bad, bad advice. Pressure washing would deeply embed moisture into the wood and take a very long time to dry. Meanwhile, painting over this treatment would severely reduce the life of a paint treatment.
|
| -Leave the upper shingles alone and paint over this. From ground level, I can see the crackling and flaking of the original paint on the very top shingle on the third floor. Can you imagine what this would look like painted-over? |
So with a crew of four, we delved into our weeks-long project…
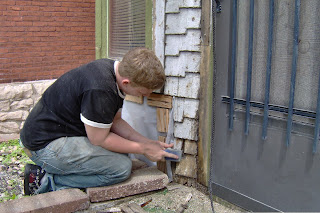
One shingle at a time...
To restore each one of them.
A heat gun and scraper certainly expedites things.
Good 'ol wood putty patches up the holes.
Most of the shingles remained amazingly intact.
Even the window moldings get the treatment.
Wonderful, is it not?
Those 1947 planters on the ends of the porch have to go.
I enjoyed doing this!
The turret area on the north side needed a complete overhaul...
First comes the new braces...
Ron, our man, is up to the task.
And things go uphill from there.
New, high-grade luan is used for replacement shingles.
Voila! Now aren't you glad we got rid of that
obliterating, &@*# planter?
Scaffolding is set up for the upper areas.
Getting out to the top of the scaffolding was easier once
we removed these boards from the Palladium windows...
And then crawled through. Here's me at the top.
The secret to staying up is to not look down.
So far, so good.
Stay tuned to our next post showing our final work on the front of Laura’s house.


2 comments:
Love what you are doing. Keep it up! My own place could use the whole paint removal treatment but I would be half-afraid that some local city official would get bent out of shape because I needed some type of lead abatement permit, or whatever. Secondly, (not a critique, just a question) did you research priming both sides of the shingles before putting them up?
Benningtoncolonial,
Thanks for your continued interest in our house. Priming and caulking are indeed protecting our shingles.
Post a Comment